Spring Balancer Support Site
Thank you very much for purchasing our spring balancer. Please read this manual carefully to prevent
problems and to ensure full performance.
1. Confirmation product of contents
Spring balancer (1 unit)
Support site guide (1 copy)
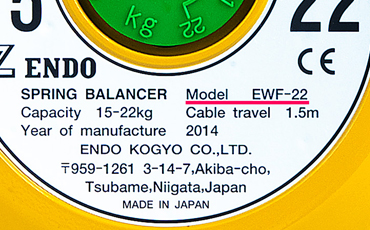
2. Confirmation of model
Check the model type on the nameplate
-
After confirming the model, be sure to download and read the instruction manual before
installation.
※If a paper instruction manual is included in the package, be sure to read the instruction manual before installation.
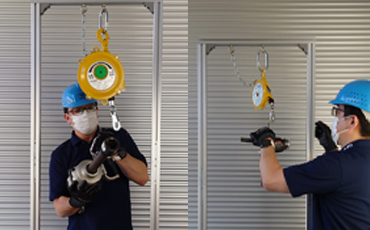
3. Installation and safety measures
-
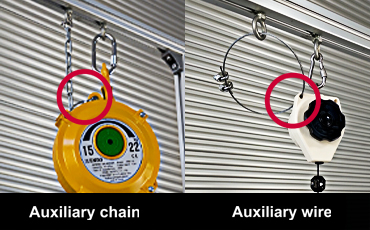
Lift up the main unit and hang it over the closed support member. An auxiliary chain or wire should
be
attached to the auxiliary hanger of the balancer body to prevent the balancer from falling if the
upper hook or
its connection parts fails. The auxiliary chain or wire should have some leeway to allow the
balancer to move freely.
※ Refer to the instruction manual for the range of necessary leeway.
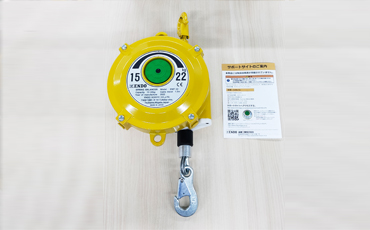
4. Factory tension setting
-
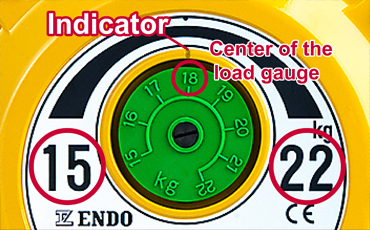
When shipped, the spring tension of the balancer body is adjusted to the center of the setting load
gauge.
In the image, EWF-22, 15kg to 22kg
Center of the load gauge=18kg
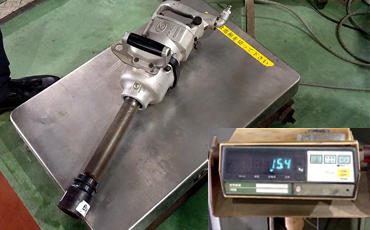
5. Check the weight of the load
-
Check the weight of the suspended load before it is applied to the balancer.
※If the weight is known, it is not necessary.
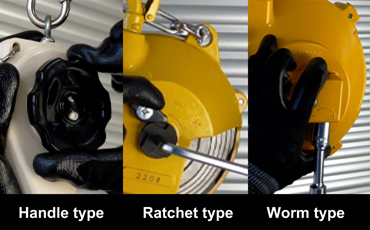
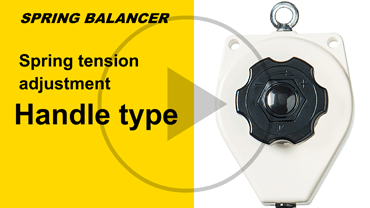
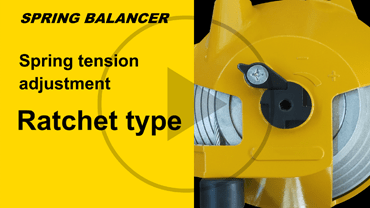
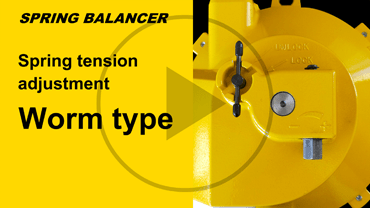
6. Tension adjustment
- Before suspending a load, adjust the spring tension according to the weight of the load.
-
There are “handle type”, “ratchet type” and “worm type”.
For all ENDO balancers, turning the adjustment parts clockwise increases the spring tension, and turning counterclockwise decreases the spring tension. Adjust the spring tension so that the gauge scale for the suspended load is set to the capacity indication point.
※The lightweight model does not have a gauge, so please adjust it after suspending the load.
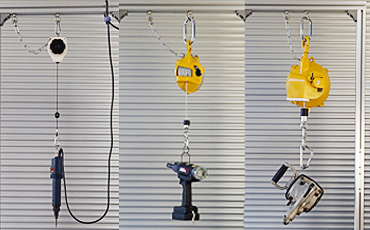
7. Hang a workpiece
-
Lift the load and hang it on the bottom hook.
If the hook is released from your hand before the load is attached, it will retract quickly potentially causing injury or damage to the balancer and or load.
8. Complete installation
-
The load value indicated by the gauge scale is for reference only.
Make the final spring tension adjustment while checking the balancer point of the suspended
workpiece.
The installation is now completed.
Troubleshooting
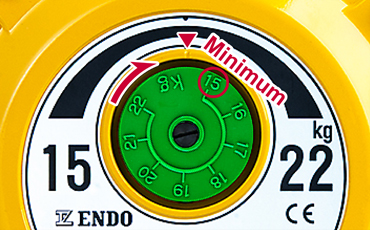
Caution1
Malfunction due to activation of safety devices.
-
Do not set the tension gauge below minimum set load(15kg).
Doing so will result in the safety device being activated and the wire rope will not be able to be pulled out.
※In the image, the minimum set load has been set below 15kg.
This condition can be deactivated by increasing the spring tension. -
When deactivating the safety device, make sure the work load is still in place on the bottom hook to prevent the wire rope from rapidly retracting potentially causing injury and/or damaging the equipment.
Make sure the workpiece weight is within the tension gauge.
Caution2
Malfunction due to tightened winding of the spring
-
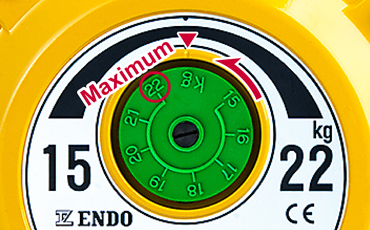
If the spring tension is increased beyond the maximum set load, the wire rope cannot be pulled
out.
Do not set the spring tension beyond the maximum setting on the gauge.
※In the image, the maximum load setting is set over 22kg.
The wire rope can be pulled out by reducing the spring tension. -
When deactivating the safety device, make sure the work load is still in place on the bottom hook to prevent the wire rope from rapidly retracting potentially causing injury and/or damaging the equipment.
Make sure the workpiece weight is within the tension gauge.
Tension Adjustment Video